

- Lectura de 28 a 38 minutos
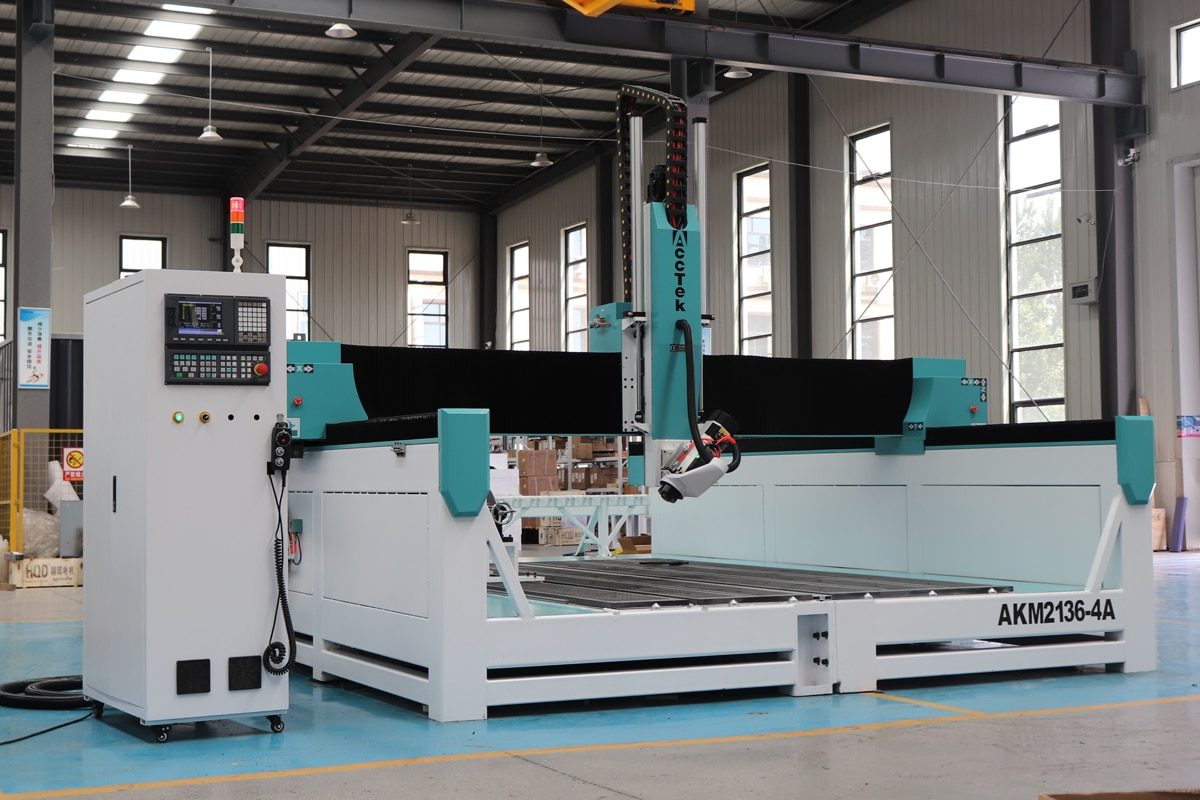
As manufacturing demands continue to evolve, CNC operators are increasingly expected to produce more complex parts with greater precision and efficiency. While Enrutadores CNC de 3 ejes remain a reliable and accessible starting point, their limitations become apparent when projects require angled cuts, intricate geometries, or reduced setup times. This is where 4-axis technology—particularly swing head CNC routers—begins to play a transformative role. A swing head Enrutador CNC de 4 ejes introduces a new level of flexibility by allowing the spindle to tilt and machine surfaces at multiple angles without repositioning the workpiece.
For beginners transitioning from 3-axis systems, this shift may seem challenging at first, as it involves new concepts in machine structure, toolpath programming, and operational techniques. However, with the right guidance, this upgrade can significantly expand machining capabilities and open the door to more advanced applications. This guide is designed to help beginners navigate the transition from 3-axis to swing head 4-axis CNC routers. It will walk you through the key differences, essential skills, and practical steps needed to confidently operate and benefit from this powerful technology.
Understanding the Basics of 3-Axis CNC Routers
Understanding the basics of 3-axis CNC routers is the first step for anyone entering the world of CNC machining. These machines, which operate along three linear axes, are the foundation of many CNC operations, offering an ideal starting point for beginners. With their straightforward design and ease of operation, 3-axis routers provide an excellent introduction to CNC technology, enabling users to learn core concepts like machine movement, toolpath programming, and material processing.
¿Qué es una fresadora CNC de 3 ejes?
A 3-axis CNC router is a computer-controlled cutting machine that operates along three linear axes: X, Y, and Z. These axes represent movement in three directions—left to right (X-axis), front to back (Y-axis), and up and down (Z-axis). By coordinating motion across these axes, the machine can precisely cut, carve, drill, and engrave materials according to a digital design. In a typical setup, the workpiece remains fixed on the machine table while the spindle moves along the three axes to shape the material. The machining process is guided by G-code generated by CAD/CAM software, enabling high accuracy and repeatability. Due to their straightforward structure and ease of operation, 3-axis CNC routers are often the first step for beginners entering CNC machining. Below are some of the most common applications:
- Woodworking and Furniture Production: 3-axis CNC routers are widely used in woodworking to cut, shape, and carve a range of wood types with high precision. They are ideal for producing furniture components such as cabinet doors, panels, and decorative elements, enabling efficient mass production as well as custom designs.
- Sign-Making and Advertising: In the signage industry, 3-axis CNC routers are commonly used to engrave and cut materials like acrylic, PVC, and aluminum composite panels. They allow for the accurate creation of letters, logos, and detailed graphic designs, making them a key tool for producing professional-quality signs.
- Plastic and Composite Processing: These machines are well-suited for machining plastics and composite materials, including ABS, PVC, and polycarbonate. Their precision and consistency make them valuable for manufacturing industrial parts, protective covers, and various custom components.
- Light Metal Machining: 3-axis CNC routers can handle soft metals such as aluminum, brass, and copper. They are typically used for tasks like drilling, slotting, and cutting simple contours, making them suitable for light-duty metal fabrication and component production.
- Hobby and DIY Projects: For hobbyists and beginners, 3-axis CNC routers offer an accessible way to explore CNC machining. They are widely used for crafting, educational purposes, and small DIY projects, allowing users to create customized designs with relative ease.
Ventajas de las fresadoras CNC de 3 ejes
3-axis CNC routers offer numerous advantages that make them a popular choice for many users, from hobbyists to professionals. These machines are valued for their simplicity, cost-effectiveness, and ability to deliver reliable results in a variety of applications. Below are the key benefits of using a 3-axis CNC router:
- Simplicity and Ease of Operation: 3-axis CNC routers are straightforward to operate, especially for beginners. With only three linear axes—X, Y, and Z—managing movement and machine setup is much easier compared to multi-axis systems. This simplicity reduces the learning curve and allows operators to quickly gain proficiency in CNC machining, making it an ideal starting point for those new to the technology.
- Cost-Effectiveness: One of the standout advantages of 3-axis CNC routers is their affordability. They typically come at a lower initial cost compared to more complex multi-axis machines, making them a more accessible option for small businesses and hobbyists. Additionally, their simpler design often means lower maintenance costs and fewer components to repair, offering long-term savings.
- Speed and Efficiency for Standard Applications: For tasks such as cutting, engraving, and drilling, 3-axis CNC routers offer fast processing times, enabling high productivity in various industries. They excel at 2D and 2.5D applications, making them a perfect fit for routine manufacturing processes where efficiency and speed are key. Their high-speed operation reduces setup times, boosting throughput.
- Precision and Repeatability: 3-axis CNC routers are capable of producing highly precise cuts and detailed designs, with repeatability that ensures consistency across multiple production runs. For businesses that require identical outputs, this precision ensures each part meets the exact specifications without deviations, making them ideal for both prototyping and mass production.
- User-Friendly Software Integration: 3-axis CNC routers are compatible with a wide range of CAD/CAM software, enabling users to easily translate digital designs into physical parts. These routers often come with intuitive software interfaces that simplify programming and allow for quick edits, making them user-friendly even for those with minimal programming experience.
Limitaciones de las enrutadores CNC de 3 ejes
While 3-axis CNC routers offer many advantages, they do have certain limitations that can impact their ability to handle more complex tasks or meet advanced production requirements. Understanding these limitations helps operators and businesses to determine when it’s time to consider upgrading to a more advanced multi-axis system. Below are the primary limitations of 3-axis CNC routers:
- Limited Capability for Complex Geometries: 3-axis CNC routers are confined to working along three linear axes (X, Y, and Z), meaning they can only produce flat or simple 2.5D shapes. They are not designed for producing parts with complex angles, undercuts, or intricate 3D geometries. For more advanced shapes or designs that require rotational movements or multi-axis machining, operators would need to rely on more advanced 4-axis or Sistemas CNC de 5 ejes.
- Multiple Setups Required for Multi-Sided Machining: When working with parts that need to be machined on multiple sides, 3-axis routers often require multiple setups. This means repositioning the workpiece, re-aligning the machine, and reprogramming toolpaths for each face. This process is time-consuming and introduces the potential for errors, which can negatively affect accuracy and productivity.
- Limited to Single-Angle Cutting: 3-axis machines can only cut in a straight line or at fixed angles along the X, Y, and Z axes. This limitation makes it difficult to achieve precise bevels, angled cuts, or parts that require rotation to access different surfaces without manually repositioning the workpiece. This restriction results in a lack of flexibility for more advanced machining tasks.
- Higher Tool Wear on Complex Cuts: When machining complex parts with sharp angles or intricate features, 3-axis routers often require more tool changes and more time spent reorienting the workpiece. This can result in higher tool wear, as the cutting tool is used more intensively and may be subjected to uneven loads when cutting certain angles or surfaces.
- Limited Automation and Advanced Toolpaths: While 3-axis CNC routers are compatible with many CAD/CAM programs, they do not offer the same level of automation or advanced toolpath strategies as multi-axis machines. More complex toolpath designs, such as those used for deep pocketing or complex milling, are generally harder to implement, requiring more manual adjustments and programming.
3-Axis CNC routers are the cornerstone of modern manufacturing, offering a simple yet effective solution for cutting, engraving, and machining a wide range of materials. Their ability to handle standard tasks with precision and speed makes them an indispensable tool in many industries. While they do have certain limitations when it comes to handling complex geometries or multi-sided machining, they remain an essential step for anyone looking to gain expertise in CNC machining. By mastering the fundamentals of 3-axis operation, you can build a solid foundation for advancing to more sophisticated machines in the future.
What Is a Swing Head 4-Axis CNC Router?
A swing head 4-axis CNC router represents a significant advancement in CNC machining, combining the traditional 3-axis movement with an additional rotational axis to enhance machining capabilities. Unlike standard 3-axis routers, which are limited to linear motion along three axes, a swing head 4-axis router introduces the A-axis, enabling the cutting tool to tilt and rotate to access multiple sides of a workpiece without needing to reposition it. This added flexibility makes it ideal for more complex operations, such as beveling, 3D carving, and machining multi-sided parts, all within a single setup.
Definición y estructura
A swing head 4-axis CNC router is a type of CNC machine that operates on four axes: three linear axes (X, Y, Z) and an additional rotational axis (A-axis). Unlike a traditional 3-axis machine, which can only move in three directions—left-right (X), forward-backward (Y), and up-down (Z)—a 4-axis swing head router introduces the ability for the spindle (cutting tool) to tilt, offering additional flexibility and precision in machining.
- Linear Axes (X, Y, Z): The first three axes—X, Y, and Z—function similarly to a traditional 3-axis CNC router. The X-axis moves left to right, the Y-axis moves front to back, and the Z-axis moves up and down. Together, these axes handle basic linear motion for cutting and engraving.
- Rotational Axis (A-Axis): The critical feature of a swing head 4-axis CNC router is the A-axis, a rotational axis that allows the spindle (cutting tool) to rotate around either the X or Y-axis (depending on the machine configuration). This additional movement allows the tool to tilt at various angles, enabling complex cuts that would be impossible with just the three linear axes.
- Swing Head Mechanism: The term “swing head” refers to the mechanism that holds the spindle and allows it to swing or tilt. This component can pivot at different angles, providing multi-directional cutting capability. The head’s rotation makes it easier to access all sides of the workpiece without the need to reposition it manually, offering higher precision and reducing machine downtime during setups.
- How It Works: The swing head rotates around a fixed point, tilting the spindle to different angles along the A-axis. This additional movement allows the machine to perform cuts and engravings that require multiple angles, such as beveling, undercuts, or complex 3D shapes. By combining the rotational movement of the A-axis with the linear movements of the X, Y, and Z axes, the swing head router can machine all sides of a workpiece without manual intervention, improving both efficiency and accuracy.
Difference Between Swing Head and Rotary Axis Systems
Both swing head and rotary axis systems are used in 4-axis CNC routers to add an additional rotational movement beyond the basic X, Y, and Z linear axes. However, they differ in terms of design, functionality, and the specific types of machining tasks they are best suited for. Here’s a breakdown of the differences:
- Mechanism of Movement: In a swing head system, the spindle or cutting tool itself tilts or rotates around a fixed axis, enabling the tool to access different angles of the workpiece without moving the material. In contrast, a rotary axis system rotates the workpiece around an axis while the cutting tool remains stationary.
- Applications and Capabilities: Swing head systems are primarily used for complex, multi-angle machining tasks that require the cutting tool to access different surfaces of a part without repositioning the workpiece. This makes them ideal for intricate designs like bevel cutting, multi-sided machining, and 3D surface creation. Rotary axis systems, however, are best suited for cylindrical or rotational machining tasks, such as engraving or cutting around the outer surface of round objects.
- Setups and Efficiency: A swing head system is highly efficient for complex parts as it allows the cutting tool to access multiple angles without needing to reposition the workpiece, reducing setup times and increasing machining speed. In contrast, a rotary axis system also reduces setup time by allowing continuous 360-degree machining of cylindrical parts, but it may require additional setups for non-circular shapes or complex geometries that are not suited for rotational machining.
- A swing head 4-axis CNC router represents a significant advancement in CNC machining, combining the traditional 3-axis movement with an additional rotational axis to enhance machining capabilities. Unlike standard 3-axis routers, which are limited to linear motion along three axes (X, Y, and Z), a swing head 4-axis router introduces the A-axis, enabling the cutting tool to tilt and rotate to access multiple sides of a workpiece without needing to reposition it. This added flexibility makes it ideal for more complex operations, such as beveling, 3D carving, and machining multi-sided parts, all within a single setup. In this section, we’ll explore the definition, structure, and key features of a swing head 4-axis CNC router, providing a solid understanding of its functionality and benefits over traditional 3-axis machines.
Key Advantages Over 3-Axis Machines
Swing head 4-axis CNC routers offer several compelling advantages over traditional 3-axis machines, particularly when it comes to increasing machining capabilities, reducing setup time, and enhancing efficiency. Below are the key advantages that swing head 4-axis routers bring to the table, setting them apart from their 3-axis counterparts:
- Ability to Machine Multiple Sides Without Repositioning: Unlike 3-axis machines, a swing head system allows the cutting tool to tilt and reach various angles. This capability reduces setup times, minimizes the risk of alignment errors, and improves overall machining efficiency.
- Increased Versatility and Complex Machining Capabilities: A swing head 4-axis router offers greater flexibility by allowing for complex operations that are not possible with a 3-axis machine. This includes tasks like beveling, undercutting, and creating intricate 3D geometries. The added A-axis allows the tool to move in more directions, expanding the range of applications.
- Faster Production Times and Reduced Labor: By eliminating the need for multiple setups, swing head 4-axis CNC routers significantly reduce production times. With the ability to complete multi-angle machining in a single operation, these machines streamline workflows, reduce downtime, and speed up turnaround times. This leads to increased productivity and lower labor costs, as fewer manual adjustments and re-alignments are needed throughout the process.
- Improved Accuracy and Reduced Alignment Errors: One of the key challenges with 3-axis CNC routers is the potential for alignment errors when repositioning the workpiece for multiple-sided machining. A swing head 4-axis router minimizes this issue by allowing the workpiece to remain stationary while the cutting tool moves to different angles. This enhanced precision results in higher-quality products.
A swing head 4-axis CNC router opens up new possibilities for CNC machining by allowing the cutting tool to move in more directions, facilitating the creation of complex parts with higher accuracy and efficiency. Its ability to tilt and rotate the spindle around an additional axis provides significant advantages. For industries requiring intricate parts, tight tolerances, and multi-angle cuts, the swing head 4-axis router proves to be an invaluable tool, offering a higher level of flexibility and productivity than its 3-axis counterparts.
Key Differences Between 3-Axis and Swing Head 4-Axis CNC Routers
When choosing between a 3-axis and a swing head 4-axis CNC router, it is first necessary to understand the key differences between these two types of machines. While both offer precise machining, the additional rotational capability of a swing head 4-axis CNC router provides significant advantages in terms of versatility, complexity, and efficiency. We will explore the primary differences in their mechanical structure, programming complexity, machining capabilities, and setup efficiency, among others. By comparing these two systems, you will gain a clearer understanding of how the swing head 4-axis CNC router can enhance your machining process compared to the more traditional 3-axis router.
Estructura Mecánica
- A 3-axis CNC router operates along three linear axes: X (left-right), Y (front-back), and Z (up-down). The spindle moves in these three directions to cut, engrave, or carve the workpiece. The machine’s design is relatively simple and cost-effective, with the cutting tool remaining stationary in relation to the workpiece along each axis.
- A swing head 4-axis CNC router incorporates an additional A-axis, which allows the spindle to rotate or tilt, enabling more complex cutting angles. This fourth axis provides an extra level of movement, allowing the cutting tool to access different angles on the workpiece without repositioning it. The spindle’s ability to rotate around a fixed point makes it ideal for multi-angle machining.
Complejidad de programación
- Programming for a 3-axis CNC router is simpler because the machine moves along just three axes. Users typically create toolpaths with straightforward G-code and CAD/CAM software, focusing on flat or simple 2.5D designs. Programming is relatively beginner-friendly, making it suitable for users just starting out in CNC machining.
- Programming a swing head 4-axis CNC router is more complex due to the additional rotational axis. The added movement requires more sophisticated programming, particularly in terms of multi-axis toolpaths, rotation angles, and the manipulation of the A-axis. CAM software and post-processors capable of handling 4-axis operations are often necessary to generate the correct G-code for these machines.
Capacidades de mecanizado
- 3-Axis routers are limited to machining flat or 2.5D shapes and are best suited for tasks such as engraving, cutting, and simple carving. While they can handle a variety of materials and are useful for standard applications like sign-making and furniture production, they cannot perform complex angles, undercuts, or 3D surface machining without repositioning the workpiece multiple times.
- Swing head 4-axis CNC routers excel at machining more complex geometries, such as multi-angle cuts, bevels, undercuts, and intricate 3D shapes. The rotational A-axis allows the tool to access different surfaces of the workpiece without requiring manual repositioning. This makes 4-axis machines suitable for advanced applications that demand high precision and complex geometric structures.
Configuración y eficiencia
- On a 3-axis CNC router, users typically need to reposition the workpiece multiple times to machine different sides or angles, which can be time-consuming and prone to alignment errors. Multiple setups often increase machine downtime and labor costs, making it less efficient for multi-sided machining tasks.
- A swing head 4-axis router reduces the need for multiple setups by allowing the cutting tool to reach multiple sides of the workpiece in a single operation. This increased efficiency not only reduces setup time but also minimizes the risk of misalignment between different machining stages, leading to more accurate and consistent results.
Costo e inversión
- Due to their simpler design and fewer moving parts, 3-axis CNC routers are generally more affordable than 4-axis machines. They are a cost-effective option for users who need to perform basic machining tasks without requiring advanced capabilities.
- While the addition of the A-axis makes 4-axis CNC routers more expensive, the enhanced functionality justifies the higher price for users who require more advanced machining. The ability to perform multi-angle cuts in a single setup, reduce labor costs, and expand machining capabilities can provide significant returns on investment for industries that rely on precision and complex parts.
The choice between a 3-axis and a swing head 4-axis CNC router largely depends on the complexity of the parts being produced and the level of precision required. While 3-axis machines offer simplicity and cost-effectiveness for basic tasks, swing head 4-axis routers introduce added flexibility and the ability to machine multi-sided, complex geometries with greater efficiency. For applications that demand intricate, multi-angle machining, the swing head 4-axis router provides a clear advantage, offering faster production times, higher accuracy, and a wider range of capabilities. Understanding these key differences will help you choose the right CNC system for your needs and maximize productivity.
Preparándose para la Transición
Transitioning from a 3-axis to a swing head 4-axis CNC router represents a significant shift in both capabilities and complexity. While 3-axis CNC routers are often sufficient for simple, flat machining tasks, a 4-axis machine introduces the ability to machine more complex geometries, multi-angle cuts, and intricate 3D shapes. However, making this transition requires careful preparation, including upgrading programming skills, adapting to new software, and understanding machine setup procedures. Below are the key areas to focus on to ensure a smooth and successful transition.
Skills You Need to Upgrade
Transitioning from a 3-axis CNC router to a swing head 4-axis system introduces a new level of complexity in both programming and machine operation. To ensure a smooth transition, operators must develop new skills and refine existing ones to fully harness the capabilities of the 4-axis machine.
- Multi-Axis Programming and Toolpath Creation: One of the most important skills to upgrade is the ability to program multi-axis toolpaths. In a 3-axis machine, programming is relatively simple and involves basic linear movements. With a swing head 4-axis router, however, you will need to account for the additional rotational A-axis. Operators must be proficient in G-code and CAM software that supports 4-axis programming, and understand how to create toolpaths that correctly guide the tool along both the linear and rotational axes.
- Understanding of A-Axis Movements: The A-axis introduces rotational movement around the X or Y axis, and understanding how it works helps effective 4-axis machining. Operators need to be able to calculate angles, adjust cutting strategies, and recognize when to utilize the A-axis for specific machining operations. A solid grasp of how the A-axis works in conjunction with the X, Y, and Z axes will allow operators to avoid errors and produce high-quality parts with multi-angle cuts, bevels, or undercuts.
- 3D Visualization and Spatial Awareness: With the added complexity of the A-axis, operators will need improved 3D visualization and spatial awareness to fully comprehend the cutting process. Unlike 3-axis machining, where the cutting tool only moves in straight lines along the three axes, 4-axis machining requires thinking in multiple dimensions simultaneously. This skill is essential when working with complex parts that involve multiple angled cuts or intricate geometries, where precise planning and orientation are necessary.
Requisitos de Software
Transitioning to a swing head 4-axis CNC router requires upgrading or modifying your CAD/CAM software to handle the complexities of multi-axis machining. Unlike 3-axis systems, which primarily focus on linear movements along the X, Y, and Z axes, 4-axis routers introduce the need for software that can manage rotational movements around the A-axis.
- Advanced CAD/CAM Software for 4-Axis Machining: To fully utilize the capabilities of a swing head 4-axis CNC router, you need advanced CAD/CAM software that supports multi-axis operations. The software should enable you to design complex parts and generate toolpaths that incorporate both linear and rotational movements. It should also be able to simulate how the cutting tool will move through the material, including how the A-axis will tilt and rotate the spindle for multi-angle cuts or complex 3D geometries. Popular CAD/CAM software options that support 4-axis operations include Fusion 360, Mastercam, SolidWorks with CAMWorks, and Siemens NX.
- Post-Processor Compatibility: For 4-axis CNC routers, you will need a post-processor that supports the additional rotational movements of the A-axis. Ensure that your software has a 4-axis post-processor specifically tailored for your machine. Some software packages come with built-in post-processors, while others may require custom post-processing files to accommodate unique machine configurations. A well-configured post-processor ensures that the generated G-code is accurate and optimized for your swing head 4-axis CNC router.
Machine Setup and Workspace Considerations
Successfully transitioning to a swing head 4-axis CNC router requires careful attention to the machine setup and workspace environment. These considerations ensure that the machine operates efficiently, accurately, and safely while maximizing productivity.
- Workspace Organization: The workspace should allow for easy loading and unloading of materials, proper tool storage, and easy access to maintenance equipment. Ensuring that materials are securely clamped and that the necessary tools are organized will prevent downtime, reduce the risk of tool damage, and streamline the machining process. A clear and orderly workspace contributes to overall machine performance and operator safety.
- Electrical and Power Requirements: Ensuring the correct voltage and amperage meet the 4-axis CNC router’s specifications, as well as checking for a stable power supply, helps protect sensitive components from power fluctuations. Proper grounding and surge protection are also necessary to avoid potential electrical damage to the system. A reliable power setup is key to ensuring smooth and continuous machine operation.
- Safety and Environmental Factors: Prioritizing safety and addressing environmental factors for operating a swing head 4-axis CNC router safely and efficiently. Safety systems such as emergency stop buttons and protective shields should be in place to safeguard operators from moving parts, debris, and coolant. Additionally, ensuring good ventilation and proper cooling can help maintain machine performance and extend the machine’s lifespan.
Successfully transitioning to a swing head 4-axis CNC router requires both technical upgrades and hands-on practice. By focusing on improving CNC programming skills, ensuring the compatibility of software and post-processors, and mastering machine setup and calibration, operators can smoothly integrate the 4-axis capabilities into their workflow. With proper training and preparation, the shift from a 3-axis to a 4-axis system will unlock new possibilities for producing complex, high-precision parts, ultimately leading to increased efficiency, accuracy, and productivity in the machining process.
Learning the Fundamentals of 4-Axis Programming
Mastering the fundamentals of 4-axis programming is necessary for operators seeking to unlock the full potential of their CNC routers. The A-axis introduces an additional dimension of rotation, enabling more complex cuts and geometries. To ensure efficient and accurate machining, understanding key elements such as toolpath creation, programming rotational movements, and simulation and verification is crucial. Below, we’ll explore each of these fundamental aspects of 4-axis programming.
Estrategias de trayectoria
In 4-axis CNC machining, two primary approaches to creating toolpaths are indexed machining and continuous machining. Both strategies involve the coordination of the rotational A-axis with the traditional linear axes (X, Y, Z), but they differ in how they manage movement and the type of parts they are best suited for. Understanding the differences between these two strategies is key to selecting the most effective method for a specific machining task.
- Indexed Machining: Indexed machining involves rotating the workpiece to a fixed position, performing a cut or operation, and then rotating it to another fixed position to perform additional cuts. The A-axis rotates the workpiece in increments to a predetermined angle for each machining step. Once the workpiece is positioned, the cutting tool follows a standard linear path to complete its operation, after which the workpiece is indexed to the next angle or position for another cut. This process continues until all required operations are completed.
- Continuous Machining: Continuous machining, on the other hand, involves a smooth, uninterrupted cutting process where the A-axis continuously rotates while the tool moves along the linear axes (X, Y, Z). Rather than indexing the workpiece to fixed angles, the A-axis gradually rotates the workpiece throughout the entire machining operation, allowing for smooth, continuous movement of the cutting tool. This strategy is ideal for parts with complex, curved, or 3D geometries where the cutting tool needs to remain engaged with the part at varying angles throughout the process.
Programming the Rotational Movements
A crucial part of 4-axis programming is learning how to correctly program rotational movements using G-code. The A-axis introduces rotational freedom to the traditional linear movement of the X, Y, and Z axes. Understanding how to correctly program rotational movements ensures that the tool moves smoothly and efficiently around the part, ultimately improving both the quality of the finished part and the machining process.
- G-Codes for A-Axis Rotation: Programming the A-axis rotation in 4-axis CNC machining is done using G-code commands. For example, G0 moves the tool rapidly to a specified position, including the A-axis rotation, while G1 allows for precise, linear interpolation including rotational movement. G2 and G3 control circular motions, utilizing the A-axis for clockwise or counterclockwise paths. The G68 command rotates the entire coordinate system, including the A-axis, to a specified angle. These G-codes enable accurate and smooth rotational movements while coordinating the A-axis with the linear axes (X, Y, and Z).
- Combining A-Axis Rotation with X, Y, Z Movements: In 4-axis machining, the A-axis rotation is combined with the linear movements of the X, Y, and Z axes to achieve complex cuts and shapes. For example, when performing angled cuts or machining a 3D surface, the A-axis rotates the spindle while the X, Y, and Z axes control the position of the cutting tool. This coordinated motion allows for precise cutting from different angles, optimizing the machining process for tasks like beveling, undercutting, and machining intricate geometries.
Simulación y Verificación
Simulation and verification in 4-axis CNC machining can ensure that the programmed toolpath will produce accurate results without causing errors or damaging the machine and workpiece. These steps allow you to visualize the machining operation, identify potential issues, and make corrections before actually running the job.
- Running the Toolpath Simulation in CAD/CAM Software: This simulation provides a virtual representation of the machining process, allowing you to visualize how the cutting tool interacts with the workpiece. You can check for errors such as incorrect toolpaths, unexpected rotations of the A-axis, or collisions with the workpiece or machine components.
- Identifying and Correcting Issues: If you notice any issues during the simulation, such as tool collisions, incorrect tool orientations, or inaccurate rotation angles, these need to be addressed immediately. Adjustments might include modifying the toolpath, changing the rotation limits, or tweaking the angle of the A-axis to ensure smooth, error-free operation. Addressing these problems early in the simulation stage helps prevent costly mistakes in the machining process.
- Performing a Dry Run on the CNC Machine: After confirming that the simulation looks good, the next step is to perform a dry run on the actual CNC machine. This involves running the program without material or using a test workpiece. The goal is to observe the real-time movements of the tool and ensure that the machine operates as expected. This step is to verify that there are no unforeseen issues that could arise during production.
A strong grasp of 4-axis programming fundamentals is key to achieving high-quality results in CNC machining. By learning how to create toolpaths that integrate both linear and rotational movements, program the A-axis for precise cutting, and verify the toolpath through simulation and dry runs, operators can ensure smoother machining operations and minimize costly errors. With these skills, operators can confidently program and optimize complex, multi-dimensional parts, taking full advantage of the flexibility and precision offered by 4-axis CNC routers. Mastery of these concepts sets the stage for more advanced programming techniques and increases productivity, accuracy, and overall machining efficiency.
Operating a 4-Axis CNC Router: Step-by-Step Guide
Operating a 4-axis CNC router requires a combination of knowledge in machine setup, programming, and execution to ensure accurate and efficient machining. From initializing the machine and setting up the tools to positioning the workpiece and running the first job, each step must be done accurately to ensure the best possible outcome. Below is a comprehensive guide to help you operate a swing head CNC router effectively.
Inicialización de la máquina
Proper machine initialization ensures the 4-axis CNC router is set up correctly, all systems are functioning properly, and the workpiece is ready for machining. This phase includes homing and calibration of the machine’s axes and setting work coordinates to ensure that both the machine and the workpiece are properly aligned.
- Power On the Machine: Turn on the CNC router and wait for the system to boot up. Make sure the control panel displays no warnings or error messages.
- Homing the Machine: Perform a homing cycle to ensure that all axes (X, Y, Z, and A) are calibrated to their reference points. This step ensures that the machine knows its exact starting position. Initiate the homing sequence from the control panel. Then the machine will move each axis to its home position, which is the reference point for all further movements.
- Calibrate the Machine: After homing, calibrate the machine’s movements to ensure accuracy. This involves checking for any backlash or misalignment, particularly in the rotational A-axis, to ensure that the spindle and tool are positioned correctly for cutting.
- Setting Work Coordinates: Once the machine is homed and calibrated, the next critical step is setting the work coordinates, which tell the CNC router where the workpiece is located relative to the machine’s reference position.
Configuración y calibración de herramientas
With the machine initialized, the next step is tool setup and calibration. These processes ensure that the cutting tools are correctly positioned, measured, and calibrated to the workpiece, allowing for accurate cuts and consistent results throughout the job.
- Select the Appropriate Tool: Choose the correct cutting tool based on the material and operation required. Common tools for 4-axis CNC routers include end mills, ball nose cutters, and drills.
- Install the Tool: Secure the selected tool in the spindle. Ensure that it is properly tightened and seated in the collet to prevent any tool slippage during machining.
- Tool Length and Offset Calibration: Set the tool length offset to ensure that the tool is correctly positioned along the Z-axis. Use a tool setter or manually touch the tool to the workpiece or a reference surface to set the tool height. Input the tool length data into the CNC control system to ensure precise cutting.
- Angle Calibration for the Swing Head: Calibration involves verifying that the spindle correctly reaches and holds specified angles, such as 45° or 90°, as commanded by the machine’s control system. By using tools like dial indicators or advanced optical systems, operators can fine-tune the swing head’s rotational accuracy, ensuring that the machine performs complex cuts, bevels, and 3D contours with precision.
- Verify Tool Setup: After installation and calibration, verify that the tool is correctly positioned by running a test program or performing a dry run. This helps ensure that the tool will engage the workpiece at the correct depth and angles.
Posicionamiento de la pieza de trabajo
The position of the workpiece directly affects the precision of the cuts and the overall quality of the finished part. It’s important to secure the workpiece firmly on the machine bed and align it accurately with the machine’s coordinate system. Correct positioning prevents misalignment during machining and ensures that all cuts are made to the exact specifications, reducing errors and material waste.
- Prepare the Workpiece: Before positioning the workpiece on the CNC router, ensure it is free from debris and properly sized according to the project requirements. Any imperfections or dirt on the surface could affect the accuracy of the machining process. If necessary, rough-cut the material to a more uniform size to simplify the positioning process.
- Align the Workpiece to the Machine’s Coordinate System: Aligning the workpiece with the machine’s coordinate system can ensure that the tool moves precisely to the correct locations. This can be done by aligning a specific feature, like a corner or center, of the workpiece to the machine’s zero point. Accurate alignment ensures that all machining operations are performed correctly.
- Secure the Workpiece: Once the workpiece is aligned, securely clamping or fixturing it to the CNC router bed is essential to prevent movement during machining. This can be done using vise clamps, vacuum tables, or magnetic fixtures, depending on the workpiece material and shape. Ensuring a stable, secure setup can avoid machining errors.
Running the First 4-Axis Job
After machine initialization, tool setup, and workpiece positioning, it’s time to run the first job on the 4-axis CNC router. The swing head feature adds an extra axis of rotation (A-axis), allowing for more complex machining tasks.
- Load the CNC Program: Load the G-code program (or CAM-generated file) into the machine’s control system. This program contains the instructions for the router, including tool paths, feed rates, spindle speeds, and the required A-axis rotations.
- Perform a Dry Run: Before cutting into the material, conduct a dry run to check for potential issues. Run the program without any material in place or with a test piece to simulate the tool’s movements and ensure everything operates as expected. Check for tool collisions with the workpiece or machine components.
- Verify the A-axis movements to ensure that the swing head rotates to the correct angles at the proper times.
- Start the Machining Process: Once the dry run is complete and no issues are detected, you can start the machining process. Load the material into the machine, start the program, and monitor the process closely. Monitor the cutting process for any signs of vibration, tool wear, or cutting inaccuracies. Adjust the feed rates or speeds if needed to optimize cutting conditions.
Successfully operating a 4-axis CNC router involves mastering a range of essential tasks, including proper machine initialization, tool calibration, workpiece positioning, and careful monitoring during machining. By following the step-by-step guide, you ensure the machine operates efficiently and that each part is machined to the highest standards of accuracy. With attention to detail, careful preparation, and ongoing adjustments, you can confidently use your 4-axis CNC router to tackle complex projects, delivering superior results across a wide variety of materials and applications.
Mejores prácticas para una transición sin problemas
Transitioning to a 4-axis CNC router can be a significant shift from 3-axis operations, requiring a combination of technical adjustments, skill development, and careful planning. To ensure a smooth transition, you need to follow a set of best practices that will help you minimize errors, optimize machine performance, and gain confidence with the new system. By starting with simple projects, using simulation tools, and maintaining proper calibration, you can navigate the shift to 4-axis machining with greater ease and efficiency.
Comience con proyectos sencillos
When transitioning to a 4-axis CNC router, starting with simple projects is one of the most effective strategies for building confidence and mastery of the machine’s capabilities. Since 4-axis machining involves an additional rotational axis for multi-angle operations, the added complexity can be overwhelming. By beginning with simpler tasks, operators can gradually learn the essentials without diving into overly complex projects.
- Types of Simple Projects to Start With: Simple projects like basic engraving, simple beveling or edge profiling, and low-complexity 3D surface cuts are excellent starting points when transitioning to 4-axis CNC machining. These tasks involve basic use of the A-axis for simple rotational movements or multi-sided machining, allowing you to practice controlling rotational angles, setting work offsets, and understanding toolpath strategies. Additionally, indexed operations, where the workpiece is rotated to fixed positions, offer a manageable way to get comfortable with multi-axis machining without the complexity of continuous rotations.
- Gradual Progression to Advanced Projects: Once you have gained confidence with simple projects, you can gradually progress to more complex tasks, such as continuous 4-axis machining and complex 3D contours. Moving from indexed operations to continuous machining allows you to tackle more dynamic cuts, such as sculpting or cutting complex geometries, while working with 3D contours introduces the challenge of creating intricate designs that require both rotational and linear movements. This gradual progression ensures that you are continuously improving and expanding your skill set as you become more comfortable with multi-axis machining.
Utilice ampliamente las herramientas de simulación
When transitioning to 4-axis CNC machining, one of the most valuable tools in your workflow is simulation software. Using simulation tools extensively allows operators to virtually test toolpaths and identify potential issues before they occur on the actual machine.
- Types of Simulations to Run: Toolpath simulations help visualize the movement of the tool along the X, Y, Z, and A axes. Collision detection checks for any interference between the tool, workpiece, and machine components during rotation. Stock and tool visualization simulations allow you to monitor material removal and confirm that the tool doesn’t miss any areas or cut too deeply. These simulations ensure all aspects of the machining process are optimized before running the program on the machine.
- Integrating Simulation into the Workflow: Always run a simulation before executing a new program on the machine to verify that it functions as expected. After making any program adjustments, re-simulate to ensure that no new issues have been introduced. Regularly updating your simulation software ensures compatibility with the latest machine and tool standards, helping you avoid discrepancies between the virtual and actual machining processes. This step-by-step integration into the workflow helps prevent mistakes and improve overall production efficiency.
Maintain Proper Machine Calibration
Calibration is the process of ensuring that all axes—X, Y, Z, and A—are correctly aligned and moving according to specified parameters. Inaccurate calibration can result in errors during machining, such as misaligned cuts, incorrect toolpath execution, or even machine crashes. Regular calibration helps maintain precision, extend the life of the machine, and ensure that parts are produced to the correct specifications.
- Key Areas to Focus on During Calibration: Key areas to focus on during calibration include the A-axis, linear X, Y, Z axes, and tool offsets. The A-axis must be calibrated to rotate smoothly to the correct angles to avoid inaccuracies in complex machining operations. Linear axes need calibration to ensure precise tool movement along their respective paths, while tool offset calibration ensures the tool’s position relative to the workpiece is accurate. Additionally, workpiece alignment should be verified to prevent misalignment during machining. Regular checks of these critical areas help maintain consistent precision and avoid errors during the production process.
- Steps for Effective Calibration: Effective calibration begins with regular machine inspections to identify any signs of wear or misalignment. Precision tools, such as dial indicators and laser calibration systems, are essential for measuring and adjusting the machine’s movements. The A-axis should be rotated through various angles to verify that it stops at the correct positions, and any discrepancies should be corrected through adjustments to the machine’s parameters. Keeping a record of calibration data helps track performance over time, making it easier to identify trends and address issues proactively. These steps ensure that the machine operates within tolerance and performs efficiently.
Aprendizaje y Formación Continuos
Continuous learning and training both operators and technicians to stay ahead of technological advancements and ensure they are maximizing the machine’s capabilities. This ongoing process of education not only improves the skills of individuals but also enhances the overall efficiency, precision, and safety of the entire machining process.
- Key Areas for Ongoing Training: This should focus on areas such as CAD/CAM software proficiency, machine setup and calibration, advanced machining techniques, safety and best practices, and troubleshooting. Staying current with software updates and new features enhances programming capabilities, while mastering machine calibration and setup ensures precise operations. Advanced techniques like multi-axis machining and toolpath optimization improve cutting accuracy, while regular safety training fosters a secure working environment. Developing problem-solving skills also enables quicker resolution of technical issues, preventing costly downtime.
- Training Methods and Approaches: Training methods like hands-on workshops, online courses, on-the-job training, and manufacturer-specific programs are all effective ways to continue learning in CNC machining. Practical workshops provide real-world experience with machine setup and operation, while online courses offer flexibility for learning new techniques and certifications. On-the-job training, often guided by more experienced operators, enhances skills in real-world environments, and manufacturer-specific training ensures in-depth knowledge of the machines and software being used. Simulation-based training also helps operators practice without risk to equipment or materials.
Following the best practices for transitioning to a 4-axis CNC router, you can ensure that you are fully prepared to handle the increased complexity of multi-axis machining. Starting with simple projects, using simulation tools to test toolpaths, and regularly calibrating your machine are all essential steps to minimizing errors and improving your machining accuracy. With a solid understanding of these practices, you’ll be able to confidently take on more advanced projects, optimize production efficiency, and achieve high-quality results with your new 4-axis system. The smoother the transition, the quicker you can leverage the full capabilities of your machine for complex, high-precision work.
Resumir
The transition from a 3-axis to a 4-axis CNC router opens up a whole new world of machining possibilities, allowing for more intricate and precise parts, enhanced versatility, and the ability to work with complex geometries. While the learning curve can seem steep, following the right steps helps ensure a smooth transition. By taking the time to understand the fundamentals of swing head operation, learning 4-axis programming, and mastering the machine’s setup, operators can unlock the full potential of their 4-axis systems. Continue reading “Maximizing the Potential of 4-Axis CNC Routers with Swing Heads: Tips for Operators” to discover additional techniques that will enable you to confidently tackle complex machining projects.
AccTek CNC is a leading manufacturer specializing in CNC routers, offering a wide range of machines designed to meet the diverse needs of our customers. We provide 3-axis, 4-axis, 5-axis, and rotary-axis CNC routers, each engineered to deliver exceptional precision, versatility, and efficiency. Whether you require standard machines or custom-designed solutions, our machines are built to tackle a variety of materials and applications, ensuring high-quality results. We invite you to explore our offerings further and learn how our CNC routers can enhance your production processes and help you achieve your specific goals.