

- Đọc 10-15 phút
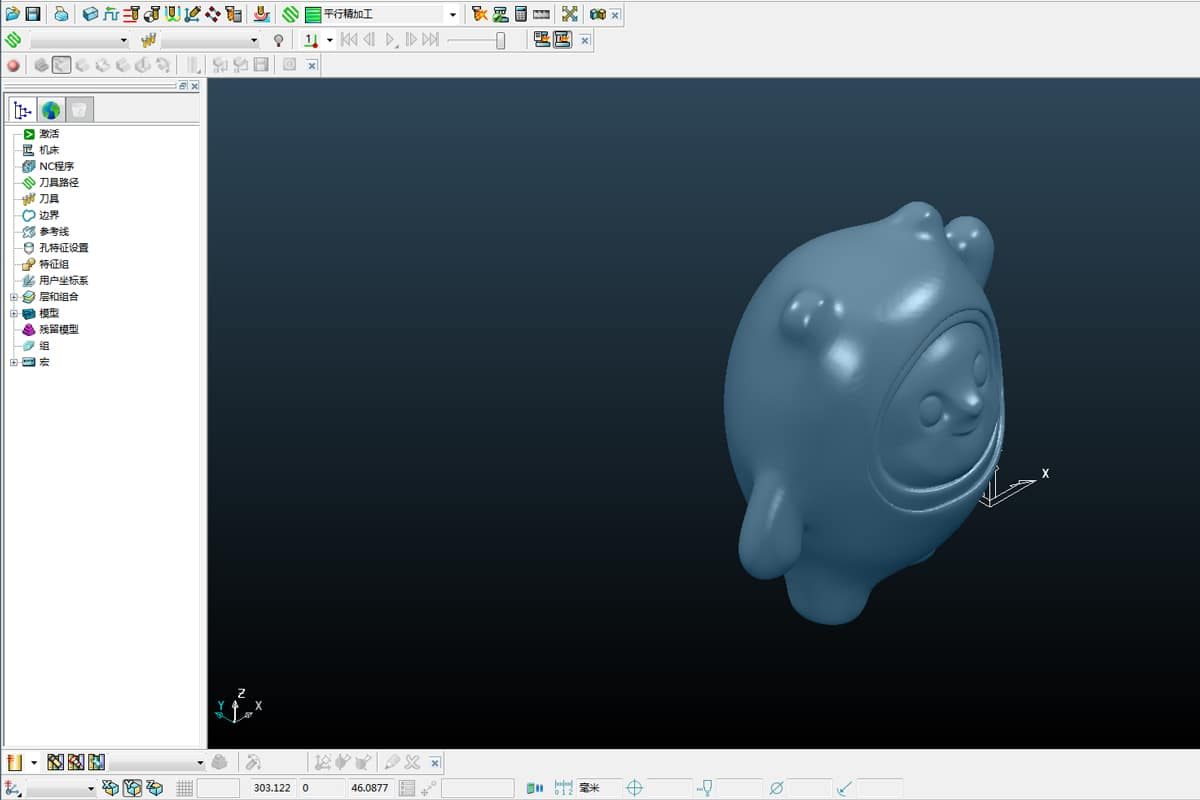
Trong bối cảnh sản xuất đòi hỏi độ chính xác cao hiện nay, máy phay CNC đã trở thành công cụ thiết yếu để chuyển đổi các thiết kế kỹ thuật số thành sản phẩm hữu hình, chất lượng cao. Từ các chi tiết gỗ tinh xảo và các bộ phận kim loại chi tiết đến các nguyên mẫu công nghiệp quy mô lớn, máy phay CNC cung cấp độ chính xác, tính lặp lại và hiệu quả cần thiết trong quy trình sản xuất hiện đại. Tuy nhiên, để đạt được thành công nhất quán với máy phay CNC không chỉ đơn giản là nhấn nút “bắt đầu” trên máy.
Hành trình từ thiết kế CAD đến gia công cắt cuối cùng là một quy trình nhiều giai đoạn đòi hỏi lập kế hoạch cẩn thận, kiến thức kỹ thuật và kỷ luật vận hành. Từ thiết kế kỹ thuật số và lập trình đường chạy dao đến thiết lập máy và xử lý hậu kỳ, mỗi giai đoạn đều đóng vai trò quan trọng trong việc đảm bảo sản phẩm cuối cùng đáp ứng cả ý đồ thiết kế và tiêu chuẩn chất lượng. Bài viết này cung cấp hướng dẫn từng bước về các phương pháp vận hành làm nền tảng cho sự thành công của máy phay CNC, đưa ra những hiểu biết thực tiễn và các phương pháp tốt nhất cho các chuyên gia muốn tối ưu hóa quy trình làm việc và đạt được kết quả tốt nhất.
Thiết kế CAD: Nền tảng của gia công CNC
Thiết kế CAD là bước đầu tiên trong quy trình gia công CNC, không chỉ xác định hình thức bên ngoài của chi tiết hoặc sản phẩm mà còn cả độ bền cấu trúc, kích thước và khả năng gia công của nó. Một tệp CAD được thiết kế kém có thể dẫn đến các vấn đề phát sinh sau này trong việc tạo đường chạy dao, thiết lập máy và cuối cùng là chất lượng của sản phẩm hoàn thiện.
Hiểu về CAD trong gia công CNC
Phần mềm CAD (Thiết kế hỗ trợ máy tính) cho phép các nhà thiết kế tạo ra các bản vẽ 2D chính xác hoặc mô hình 3D của các bộ phận mà họ dự định sản xuất. Các bản thiết kế kỹ thuật số này đóng vai trò là nền tảng để tạo đường chạy dao và điều khiển chuyển động của máy. Một số chương trình CAD được sử dụng phổ biến nhất trong gia công CNC bao gồm:
- AutoCAD: Lý tưởng cho việc vẽ bản vẽ 2D và bản vẽ kỹ thuật.
- Fusion 360: Kết hợp các công cụ CAD, CAM và CAE trong một nền tảng duy nhất để mô hình hóa và gia công 3D.
- SolidWorks: Một công cụ CAD 3D mạnh mẽ được sử dụng rộng rãi trong thiết kế cơ khí và công nghiệp.
- SketchUp: Phần mềm thân thiện với người dùng, lý tưởng cho chế biến gỗ và mô hình 3D cơ bản.
Thiết kế cho khả năng gia công
Thiết kế CAD tốt không chỉ注重 tính thẩm mỹ mà còn cả chức năng và khả năng sản xuất. Các nhà thiết kế phải tính đến những hạn chế và khả năng của máy cắt CNC.
- Khả năng tiếp cận dụng cụ: Máy phay CNC thường sử dụng các dụng cụ cắt quay, không thể tạo ra các góc trong sắc nhọn. Do đó, các thiết kế có góc trong 90 độ có thể cần sử dụng các đường bo tròn để cho phép dụng cụ hoàn toàn vượt qua vật liệu. Tương tự, các rãnh hẹp hoặc các hốc sâu vượt quá tầm với hoặc đường kính của các mũi khoan tiêu chuẩn nên được tránh hoặc thiết kế lại với các chiến lược thay thế khác.
- Thu nhỏ chi tiết: Các chi tiết cực nhỏ có thể trông ấn tượng trên màn hình nhưng có thể không thực tế hoặc không thể tái tạo chính xác, đặc biệt khi làm việc với các vật liệu cứng hơn như nhôm hoặc ở tốc độ in cao. Các nhà thiết kế luôn nên xem xét công cụ nhỏ nhất có thể sử dụng trong thực tế và thu nhỏ chi tiết cho phù hợp.
- Định hướng và bố trí: Lập kế hoạch cắt các chi tiết với hướng vân gỗ tối ưu, giảm thiểu độ rút dao và sắp xếp phôi hiệu quả không chỉ đảm bảo các đường cắt mịn hơn mà còn cải thiện việc sử dụng vật liệu và tốc độ sản xuất.
Chuẩn bị tập tin
Sau khi thiết kế hoàn tất, việc chuẩn bị tệp tin đúng cách sẽ đảm bảo quá trình chuyển đổi sang giai đoạn CAM diễn ra suôn sẻ. Các nhà thiết kế nên sắp xếp các lớp một cách hợp lý, dán nhãn các thành phần rõ ràng và kiểm tra kỹ đơn vị đo lường. Các định dạng tệp tin phổ biến cho gia công CNC bao gồm:
- DXF, DWG: Được sử dụng rộng rãi cho thiết kế đồ họa vector 2D.
- STEP, IGES: Được ưa chuộng cho mô hình 3D, với khả năng tương thích tốt trên nhiều hệ thống.
- SVG, AI: Đôi khi được sử dụng cho các ứng dụng tạo đường viền trang trí hoặc làm biển hiệu.
- STL: Hữu ích cho in 3D hoặc tạo hình bề mặt nhưng không lý tưởng cho phay CNC chính xác do cấu trúc nhiều mặt của nó.
Hiểu rõ những kiến thức cơ bản về phần mềm CAD, thiết kế có tính đến khả năng gia công, và dành thời gian sắp xếp các tệp tin một cách hợp lý, các nhà vận hành và thiết kế máy CNC có thể đảm bảo quy trình làm việc liền mạch từ ý tưởng kỹ thuật số đến sản phẩm thực tế. Đầu tư công sức vào giai đoạn thiết kế giúp giảm thiểu lỗi, giảm thiểu việc làm lại và cải thiện hiệu quả tổng thể trong suốt quá trình gia công CNC. Với nền tảng CAD vững chắc, con đường dẫn đến kết quả chất lượng cao trở nên rõ ràng và dễ đạt được hơn nhiều.
Lập trình CAM: Chuyển đổi thiết kế thành đường chạy dao
Sau khi hoàn thành thiết kế CAD, bước quan trọng tiếp theo trong quy trình gia công CNC là tạo ra các đường chạy dao sẽ hướng dẫn máy trong quá trình cắt. Quá trình này được thực hiện thông qua phần mềm CAM, phần mềm này chuyển đổi mô hình kỹ thuật số tĩnh thành các hướng dẫn động mà máy CNC có thể tuân theo. Lập trình CAM hiệu quả không chỉ đảm bảo máy cắt đúng hình dạng mà còn thực hiện một cách hiệu quả, an toàn và với độ hoàn thiện bề mặt mong muốn.
Tìm hiểu về phần mềm CAM
Phần mềm CAM (Sản xuất hỗ trợ bằng máy tính) đóng vai trò là cầu nối giữa thiết kế và gia công vật lý. Nó cho phép người dùng xác định cách thức cắt vật liệu. Không giống như CAD, tập trung vào hình học và bố cục trực quan, CAM chú trọng vào chuyển động, logic và tối ưu hóa. Các giải pháp CAM phổ biến bao gồm:
- Fusion 360 (Không gian làm việc CAM): Lý tưởng cho cả người mới bắt đầu và người dùng nâng cao.
- VCarve và Aspire: Được sử dụng rộng rãi trong ngành chế biến gỗ và làm biển hiệu.
- Mastercam: Phần mềm mạnh mẽ dành cho gia công công nghiệp và gia công chính xác cao.
- ArtCAM: Thường được sử dụng trong các ứng dụng chạm khắc nghệ thuật và phù điêu.
Lựa chọn chiến lược đường chạy dao phù hợp
Việc lựa chọn đường chạy dao phụ thuộc vào thiết kế chi tiết, vật liệu và mục đích sử dụng. Các loại đường chạy dao phổ biến bao gồm:
- Cắt theo hình dạng: Phương pháp này cắt theo đường viền của hình khối; được sử dụng để cắt các chi tiết ra khỏi vật liệu.
- Tạo rãnh: Làm sạch bên trong một khu vực; lý tưởng cho các hốc hoặc các chi tiết được khắc.
- Khắc laser: Thêm văn bản hoặc họa tiết nông, chi tiết.
- Khoan: Tạo ra các lỗ tròn với đường kính và độ sâu xác định.
- Khắc chữ V: Được sử dụng để tạo chữ và hình dạng trang trí hoặc có chiều sâu bằng mũi khắc chữ V.
Thiết lập dụng cụ và vật liệu
Một chương trình CAM chính xác phải được thiết kế phù hợp với cả dụng cụ cắt và vật liệu cần gia công. Các yếu tố cần xem xét chính bao gồm:
- Lựa chọn dụng cụ: Chọn loại mũi khoan phù hợp (mũi phay ngón, mũi phay cầu, mũi phay chữ V, v.v.) dựa trên hình dạng vết cắt và vật liệu.
- Tốc độ tiến dao và tốc độ quay: Xác định tốc độ di chuyển của dao qua vật liệu (tốc độ tiến dao) và tốc độ quay (vòng/phút). Các giá trị này phải phù hợp với đặc tính vật liệu để tránh mài mòn hoặc cháy dao.
- Bước cắt vượt mức và bước cắt giảm mức: Các thông số này kiểm soát lượng vật liệu được loại bỏ trong mỗi lần cắt. Tối ưu hóa chúng đảm bảo sự cân bằng giữa chất lượng cắt và hiệu quả thời gian.
Mô phỏng và xuất mã G
Trước khi gửi chương trình đến máy CNC, hãy mô phỏng đường chạy dao trong phần mềm CAM. Bước này cho phép bạn:
- Trực quan hóa quá trình cắt và phát hiện các va chạm hoặc các khu vực bị bỏ sót.
- Kiểm tra thời gian gia công ước tính.
- Xác nhận trình tự cắt và chuyển đổi dụng cụ.
Sau khi mọi thứ trông có vẻ chính xác, phần mềm CAM sẽ tạo ra mã G, các lệnh mà máy có thể đọc được để điều khiển máy phay CNC. Hãy chắc chắn chọn đúng định dạng bộ xử lý hậu kỳ cho bộ điều khiển CNC cụ thể của bạn (ví dụ: Mach3, Fanuc, GRBL, v.v.) để tránh các vấn đề về khả năng tương thích.
Lập trình CAM là nơi thiết kế được chuyển thành hành động thực tế. Nó không chỉ đơn thuần là việc ra lệnh cho máy cắt những gì mà còn là việc xác định cách thức cắt, với độ chính xác, an toàn và hiệu quả được đặt lên hàng đầu. Bằng cách lựa chọn đường chạy dao phù hợp, tối ưu hóa các thông số cắt và xem xét cẩn thận kết quả cuối cùng, người dùng có thể đảm bảo quá trình chuyển đổi từ mô hình CAD sang mã máy diễn ra liền mạch và hiệu quả. Một chương trình được lập trình tốt sẽ tạo tiền đề cho việc gia công CNC đáng tin cậy, chất lượng cao, ít xảy ra sự cố bất ngờ và mang lại kết quả tốt hơn.
Thiết lập máy CNC Router: Chuẩn bị cho quá trình cắt
Sau khi hoàn thiện thiết kế và lập trình đường chạy dao, giai đoạn quan trọng tiếp theo là thiết lập máy CNC để cắt chính xác, an toàn và hiệu quả. Giai đoạn then chốt này bao gồm việc cố định vật liệu, hiệu chỉnh máy và kiểm tra hệ thống an toàn để đảm bảo mọi thứ diễn ra suôn sẻ khi bắt đầu cắt. Bỏ qua hoặc vội vàng bước này có thể dẫn đến sai lệch, kết quả kém chất lượng hoặc thậm chí làm hỏng thiết bị. Cho dù bạn đang thực hiện một dự án chế biến gỗ đơn giản hay một công việc gia công kim loại phức tạp, một quy trình thiết lập bài bản sẽ tạo nền tảng cho độ chính xác, hiệu quả và an toàn trong xưởng.
Giữ chặt và cố định
Việc cố định chắc chắn phôi gia công rất quan trọng đối với độ chính xác và an toàn. Vật liệu không ổn định có thể dịch chuyển trong quá trình gia công, làm hỏng chi tiết hoặc gây hư hại cho dụng cụ.
- Bàn hút chân không: Lý tưởng cho các vật liệu dạng tấm phẳng như gỗ, nhựa hoặc nhôm. Chúng cung cấp khả năng giữ chắc chắn đồng đều mà không cần kẹp vật lý.
- Kẹp và ốc vít: Thích hợp cho các vật liệu dày hơn hoặc có hình dạng không đều. Hãy chắc chắn đặt chúng ở vị trí sao cho dụng cụ không bị va chạm.
- Băng keo hai mặt hoặc chất kết dính: Hiệu quả đối với các bộ phận nhỏ hoặc dễ vỡ, nhưng chỉ nên sử dụng trong các thao tác lực nhẹ.
Hãy đảm bảo bề mặt sạch sẽ và bằng phẳng, đồng thời xác nhận rằng phôi nằm sát với mặt bàn máy trước khi bắt đầu.
Hiệu chuẩn và thiết lập điểm 0 cho máy
Việc cắt chính xác phụ thuộc vào sự căn chỉnh máy chính xác. Trước mỗi công việc, cần phải hiệu chỉnh các cài đặt quan trọng:
- Đưa máy về vị trí ban đầu: Đưa tất cả các trục trở về điểm gốc để thiết lập vị trí tham chiếu nhất quán.
- Thiết lập điểm gốc phôi (X, Y, Z): Xác định điểm gốc cho công việc, thường là ở một góc hoặc tâm của vật liệu, tùy thuộc vào thiết lập CAM của bạn.
- Kiểm tra độ lệch chiều dài dao: Nếu sử dụng cảm biến chiều cao dao hoặc bàn cảm ứng, hãy đo và nhập chiều dài dao chính xác để tránh cắt quá sâu hoặc quá nông.
- Căn chỉnh trục chính và bàn máy: Định kỳ kiểm tra xem trục chính có vuông góc với bàn máy và bàn máy có bằng phẳng để duy trì độ chính xác khi cắt.
Kiểm tra an toàn và kiểm tra trước khi vận hành
Trước khi bắt đầu bất kỳ thao tác phay CNC nào, hãy thực hiện kiểm tra an toàn và chức năng kỹ lưỡng:
- Kiểm tra dụng cụ: Xác nhận dụng cụ chính xác đã được lắp đặt, sắc bén và chắc chắn trong mâm cặp.
- Kiểm tra khoảng trống và chuyển động: Di chuyển máy phay thủ công dọc theo đường đi dự định để đảm bảo không có kẹp, dây cáp hoặc vật cản nào khác chắn đường.
- Chức năng dừng khẩn cấp: Trước mỗi công việc, hãy kiểm tra nút dừng khẩn cấp để đảm bảo nó dừng ngay lập tức tất cả các chuyển động của máy và hoạt động của trục chính.
- Kiểm tra cáp và các điểm kết nối: Kiểm tra tất cả các cáp động cơ, cảm biến và trục chính xem có dấu hiệu mòn, sờn hoặc bị kẹp không. Đảm bảo các đầu nối được gắn chặt và không bị bám bụi hoặc mảnh vụn.
- Chạy thử (Tùy chọn): Thực hiện chạy thử (không khởi động trục chính) để kiểm tra đường chạy dao và chuyển động, đặc biệt đối với các công việc phức tạp.
Bước này giúp bảo vệ cả người vận hành và máy móc, đồng thời ngăn ngừa các tai nạn tốn kém, hư hỏng thiết bị hoặc thất bại dự án.
Việc thiết lập máy CNC là một khâu kiểm soát quan trọng, ảnh hưởng trực tiếp đến sự thành công của dự án. Việc sử dụng đồ gá phù hợp, hiệu chuẩn chính xác và kiểm tra kỹ lưỡng trước khi vận hành đảm bảo máy của bạn sẵn sàng thực hiện công việc với độ chính xác và sự tự tin cao. Đầu tư thời gian vào việc thiết lập cẩn thận sẽ giảm thiểu lãng phí, giảm hao mòn dụng cụ và tạo ra điều kiện lý tưởng cho quá trình gia công CNC diễn ra trơn tru và đáng tin cậy.
Kỹ thuật thực hiện: Cắt chính xác và kiểm soát
Sau khi máy CNC của bạn đã được thiết lập hoàn chỉnh và tất cả các thông số đã được xác minh, đã đến lúc bắt đầu quá trình cắt. Giai đoạn này là lúc sự chuẩn bị và lập trình của bạn được kiểm chứng. Mặc dù máy CNC là máy tự động, chúng vẫn cần sự giám sát tích cực, đặc biệt là trong giai đoạn đầu của một công việc. Cắt chính xác là việc quan sát hiệu suất, phản ứng với các điều kiện thời gian thực và đảm bảo chất lượng nhất quán từ lần cắt đầu tiên đến lần cuối cùng. Dưới đây là cách duy trì sự kiểm soát và độ chính xác trong suốt giai đoạn cắt.
Bắt đầu công việc
Trước khi bắt đầu cắt thực tế, hãy kiểm tra kỹ xem tệp mã G-code chính xác đã được tải chưa và nó có khớp với vật liệu và thiết lập trên máy hay không. Dưới đây là các bước quan trọng cần thực hiện:
- Kiểm tra thông số cuối cùng: Xác nhận tốc độ cấp liệu, tốc độ trục chính và lựa chọn dụng cụ phù hợp với cài đặt CAM của bạn.
- Biện pháp phòng ngừa an toàn: Đeo đầy đủ thiết bị bảo hộ cá nhân (kính bảo hộ, thiết bị bảo vệ tai) và đảm bảo không có ai đứng trong đường đi của máy.
- Bắt đầu với lần cắt đầu tiên được kiểm soát: Đối với các công việc quan trọng hoặc lần cắt đầu tiên, hãy giảm tốc độ cấp liệu một chút trong lần cắt đầu tiên. Điều này giúp phát hiện các vấn đề mà không gây ra hư hỏng lớn.
Giám sát thời gian thực
Ngay cả với hệ thống điều khiển tự động, việc giám sát trực tiếp vẫn cần thiết để đảm bảo mọi thứ hoạt động như mong đợi. Trong quá trình cắt:
- Cẩn thận với sự dịch chuyển vật liệu: Rung động hoặc áp lực của dụng cụ có thể làm lỏng các bộ phận cố định. Nếu xảy ra chuyển động, hãy tạm dừng công việc ngay lập tức.
- Lắng nghe các âm thanh bất thường: Tiếng rít, tiếng lách cách hoặc tiếng ồn không đều từ trục chính có thể cho thấy dụng cụ bị mòn hoặc tốc độ cấp liệu không chính xác.
- Kiểm tra xem có hiện tượng tích tụ phoi quá mức hay không: Phoi tích tụ có thể gây quá nhiệt cho dụng cụ và làm giảm chất lượng bề mặt. Sử dụng hệ thống hút bụi hoặc làm sạch thủ công khi cần thiết.
- Giám sát hoạt động của dụng cụ: Đảm bảo dụng cụ cắt sạch sẽ, không bị cháy, lệch hướng hoặc bỏ sót đường cắt.
Khắc phục sự cố trong quá trình vận hành
Ngay cả khi đã chuẩn bị kỹ lưỡng, những vấn đề không lường trước vẫn có thể phát sinh. Dưới đây là cách giải quyết các vấn đề thường gặp mà không ảnh hưởng đến an toàn hoặc chất lượng:
- Độ sâu cắt không đồng nhất: Tạm dừng công việc và kiểm tra lại hiệu chỉnh trục Z và độ phẳng của vật liệu.
- Bề mặt cắt không đều hoặc rung lắc: Thay thế dụng cụ, điều chỉnh thông số cắt hoặc cải thiện đồ gá.
- Hỏng dụng cụ: Sử dụng chiến lược đường chạy dao phù hợp, giảm tải trọng mỗi lần chạy và định vị lại kẹp một cách an toàn.
Gia công CNC có thể được tự động hóa, nhưng độ chính xác và tính nhất quán vẫn phụ thuộc rất nhiều vào sự tham gia của người vận hành trong quá trình cắt. Bằng cách giám sát chặt chẽ máy móc, phản hồi các tín hiệu trực quan và âm thanh, và khắc phục các vấn đề phát sinh, bạn đảm bảo rằng sản phẩm cuối cùng đáp ứng các tiêu chuẩn chất lượng. Việc thực hiện là đỉnh điểm của tất cả các bước trước đó, và khi được thực hiện cẩn thận và tỉ mỉ, nó sẽ biến những kế hoạch được chuẩn bị kỹ lưỡng thành kết quả chính xác và chất lượng cao.
Hậu xử lý và hoàn thiện
Sau khi máy CNC hoàn thành đường cắt cuối cùng, công việc vẫn chưa kết thúc. Giai đoạn xử lý sau gia công đảm bảo rằng chi tiết hoặc sản phẩm đáp ứng các tiêu chuẩn chất lượng yêu cầu cả về chức năng và thẩm mỹ. Giai đoạn này bao gồm việc cẩn thận lấy sản phẩm ra khỏi máy, tinh chỉnh bề mặt và kiểm tra kích thước, đảm bảo mỗi chi tiết đáp ứng cả tiêu chuẩn kỹ thuật và thẩm mỹ.
Tháo phôi gia công một cách an toàn
Trước hết, điều quan trọng là phải tắt máy đúng cách và tháo bộ phận đó ra một cách cẩn thận:
- Tắt nguồn: Hãy đảm bảo trục chính đã dừng hoàn toàn và máy đã tắt trước khi đưa tay vào khu vực làm việc.
- Tránh làm hỏng các cạnh: Sử dụng các dụng cụ nhẹ nhàng như dao cạo bằng nhựa hoặc búa mềm để tháo các bộ phận được giữ bởi bàn hút chân không, băng dính hoặc kẹp.
- Dọn dẹp mảnh vụn: Dùng chổi hoặc máy hút bụi để quét sạch bụi và vụn vật liệu xung quanh vật liệu nhằm duy trì không gian làm việc sạch sẽ cho các công việc sau này.
Việc dành thời gian tháo phôi một cách cẩn thận giúp ngăn ngừa sứt mẻ, trầy xước hoặc biến dạng, đặc biệt là với các bộ phận mỏng manh hoặc có nhiều chi tiết phức tạp.
Kỹ thuật hoàn thiện bề mặt
Hầu hết các chi tiết được cắt bằng máy CNC đều cần một số công đoạn hoàn thiện bề mặt sau khi gia công. Các quy trình hoàn thiện sẽ khác nhau tùy thuộc vào vật liệu và mục đích sử dụng cuối cùng của chi tiết.
- Chà nhám và làm mịn: Các bộ phận bằng gỗ có thể cần được chà nhám nhẹ để loại bỏ vết dụng cụ hoặc xơ gỗ. Sử dụng giấy nhám có độ mịn tăng dần để có được bề mặt mịn màng.
- Loại bỏ bavia: Đối với kim loại và nhựa, có thể sử dụng dụng cụ loại bỏ bavia hoặc dũa tay để làm sạch các cạnh sắc hoặc các mảnh vụn còn sót lại.
- Đánh bóng và phủ lớp bảo vệ: Các bộ phận kim loại có thể được đánh bóng hoặc phủ lớp bảo vệ, trong khi gỗ có thể được nhuộm màu, sơn hoặc phủ lớp chống thấm.
- Xử lý cạnh: Việc thêm các cạnh vát hoặc bo tròn bằng tay có thể cải thiện cả cảm giác và độ bền của sản phẩm hoàn thiện.
Việc lựa chọn phương pháp hoàn thiện phù hợp đảm bảo sản phẩm cuối cùng trông chuyên nghiệp và hoạt động đúng như mong muốn.
Kiểm tra và Kiểm soát Chất lượng
Một chi tiết có vẻ ngoài sạch sẽ không phải lúc nào cũng đồng nghĩa với việc nó có kích thước chính xác. Kiểm tra sau khi cắt giúp xác minh xem chi tiết có đáp ứng các thông số kỹ thuật thiết kế hay không:
- Kiểm tra kích thước: Sử dụng thước kẹp, thước đo micromet hoặc thước đo độ dày để xác nhận các kích thước quan trọng.
- Độ phẳng và độ vuông góc: Đối với các chi tiết yêu cầu dung sai chặt chẽ, hãy kiểm tra các bề mặt phẳng và các góc 90° bằng thước thẳng và thước vuông.
- Lắp ráp thử: Nếu chi tiết là một phần của cụm lắp ráp lớn hơn, hãy lắp thử nó với các bộ phận tương ứng để xác nhận sự thẳng hàng và chức năng chính xác.
- Ghi chép tài liệu: Đối với môi trường sản xuất, hãy ghi lại kết quả kiểm tra và lưu ý bất kỳ sự khác biệt nào để cải tiến quy trình trong tương lai.
Việc kiểm soát chất lượng nhất quán không chỉ đảm bảo tính toàn vẹn của công việc hiện tại mà còn xây dựng lòng tin với khách hàng và nâng cao độ tin cậy tổng thể của quá trình sản xuất.
Xử lý hậu kỳ và hoàn thiện giúp phát huy tối đa tiềm năng của sản phẩm gia công CNC bằng cách tinh chỉnh kết quả và đảm bảo chất lượng. Từ việc loại bỏ chi tiết an toàn và xử lý bề mặt đến kiểm tra kỹ lưỡng, mỗi công đoạn đều đóng vai trò quan trọng trong việc đảm bảo kết quả chuyên nghiệp và đáng tin cậy. Bằng cách đầu tư thời gian và sự chú ý vào giai đoạn cuối cùng này, bạn sẽ nâng cao sự hài lòng của khách hàng, giảm thiểu việc làm lại và duy trì các tiêu chuẩn cao trong toàn bộ quy trình sản xuất.
Các phương pháp tối ưu để gia công CNC thành công
Để đạt được kết quả nhất quán khi gia công bằng máy CNC, không chỉ cần tuân theo các bước mà còn cần một phương pháp tiếp cận có kỷ luật và chiến lược đối với toàn bộ quy trình. Từ quản lý tập tin hiệu quả đến bảo trì thiết bị và phát triển kỹ năng liên tục, việc áp dụng các phương pháp tốt nhất giúp ngăn ngừa các lỗi tốn kém, cải thiện chất lượng sản phẩm và kéo dài tuổi thọ máy.
Tối ưu hóa quy trình làm việc
Quy trình làm việc được tối ưu hóa giúp cải thiện thời gian hoàn thành công việc, giảm thiểu lỗi và tăng sự tự tin cho người vận hành. Để tối ưu hóa quy trình của bạn:
- Chuẩn hóa quy ước thiết kế và đặt tên tệp: Sử dụng cách đặt tên, quản lý phiên bản tệp và cấu trúc thư mục nhất quán để dễ dàng theo dõi và tái sử dụng.
- Xây dựng mẫu thiết lập: Lưu các cài đặt máy móc, thư viện công cụ và hồ sơ vật liệu thường dùng để tránh phải bắt đầu lại từ đầu cho mỗi công việc.
- Lập danh sách kiểm tra công việc: Sử dụng danh sách kiểm tra trước khi vận hành bao gồm xác minh vật liệu, thiết lập dụng cụ, xác nhận điểm 0 và kiểm tra an toàn.
Bảo trì định kỳ và chăm sóc máy móc
Máy móc được bảo trì tốt sẽ cho kết quả ổn định hơn và giảm nguy cơ hỏng hóc. Các biện pháp chính bao gồm:
- Vệ sinh hàng ngày: Loại bỏ bụi, vụn gỗ và các mảnh vụn khác khỏi bàn, ray và khu vực trục chính để ngăn ngừa tích tụ và mài mòn.
- Bôi trơn và hiệu chỉnh: Bôi trơn ray dẫn hướng và vít me bi theo khuyến cáo của nhà sản xuất. Kiểm tra hiệu chỉnh trục định kỳ để đảm bảo chuyển động chính xác.
- Kiểm tra và thay thế dụng cụ: Dụng cụ cùn hoặc hư hỏng ảnh hưởng đến chất lượng cắt và làm tăng áp lực lên máy. Kiểm tra dụng cụ thường xuyên và thay thế khi cần thiết.
Đào tạo và phát triển kỹ năng
Ngay cả với tự động hóa, gia công CNC vẫn là một nghề đòi hỏi kỹ năng cao và cần liên tục học hỏi. Người vận hành cần:
- Luôn cập nhật phần mềm và phần cứng: Việc cập nhật phần mềm CAM và các công nghệ công cụ mới có thể cải thiện đáng kể quy trình làm việc và khả năng hoạt động.
- Hiểu về đặc tính vật liệu: Tìm hiểu cách các vật liệu khác nhau phản ứng với lực cắt, tốc độ cấp liệu và kỹ thuật hoàn thiện.
- Ghi chép và phân tích kết quả: Lưu giữ hồ sơ về các thông số cắt, phản ứng của vật liệu và chất lượng sản phẩm để tham khảo và khắc phục sự cố trong tương lai.
Việc tích hợp các phương pháp tốt nhất vào quy trình gia công CNC sẽ thúc đẩy văn hóa chính xác, độ tin cậy và cải tiến liên tục. Bằng cách tối ưu hóa quy trình, bảo trì thiết bị và luôn cập nhật các công cụ và kỹ thuật mới, bạn không chỉ nâng cao hiệu suất hàng ngày mà còn đảm bảo thành công lâu dài. Những biện pháp chủ động này giúp bạn đáp ứng nhu cầu dự án ngày càng thay đổi đồng thời xây dựng một hoạt động CNC hiệu quả và bền vững hơn.
Tóm tắt
Gia công CNC là sự kết hợp mạnh mẽ giữa thiết kế kỹ thuật số và sản xuất chính xác, nhưng thành công thực sự nằm ở việc nắm vững từng giai đoạn của quy trình—từ thiết kế CAD đến hoàn thiện cuối cùng. Bằng cách hiểu cách tạo ra các thiết kế có thể gia công được, chuyển đổi chúng thành các đường chạy dao hiệu quả, thiết lập máy đúng cách, thực hiện các đường cắt cẩn thận và áp dụng quy trình xử lý hậu kỳ kỹ lưỡng, người vận hành có thể liên tục đạt được kết quả chất lượng cao. Những phương pháp vận hành này không chỉ giảm thiểu lãng phí và thời gian ngừng hoạt động mà còn xây dựng nền tảng vững chắc cho năng suất và sự đổi mới. Để biết thêm mẹo về vận hành máy, hãy đọc bài viết “ Cách đạt được hiệu suất mong muốn của máy CNC Router ”.
Nếu bạn đang tìm kiếm một đối tác đáng tin cậy và chuyên nghiệp trong lĩnh vực gia công CNC, AccTek CNC là một lựa chọn tuyệt vời. Là nhà sản xuất máy CNC chuyên dụng, AccTek cung cấp nhiều loại máy chất lượng cao được thiết kế để đáp ứng nhu cầu của nhiều ngành công nghiệp khác nhau. Bên cạnh việc cung cấp thiết bị bền bỉ và được chế tạo chính xác, chúng tôi cũng cam kết hỗ trợ sự thành công của bạn thông qua dịch vụ hậu mãi toàn diện, bao gồm hỗ trợ kỹ thuật, đào tạo và hỗ trợ khắc phục sự cố. Cho dù bạn đang nâng cấp hệ thống hiện tại hay bắt đầu một hoạt động CNC mới, AccTek CNC đều cung cấp cả công nghệ và chuyên môn để giúp bạn đạt được kết quả hiệu quả, chính xác và đáng tin cậy.