

- 13-18 دقيقة للقراءة
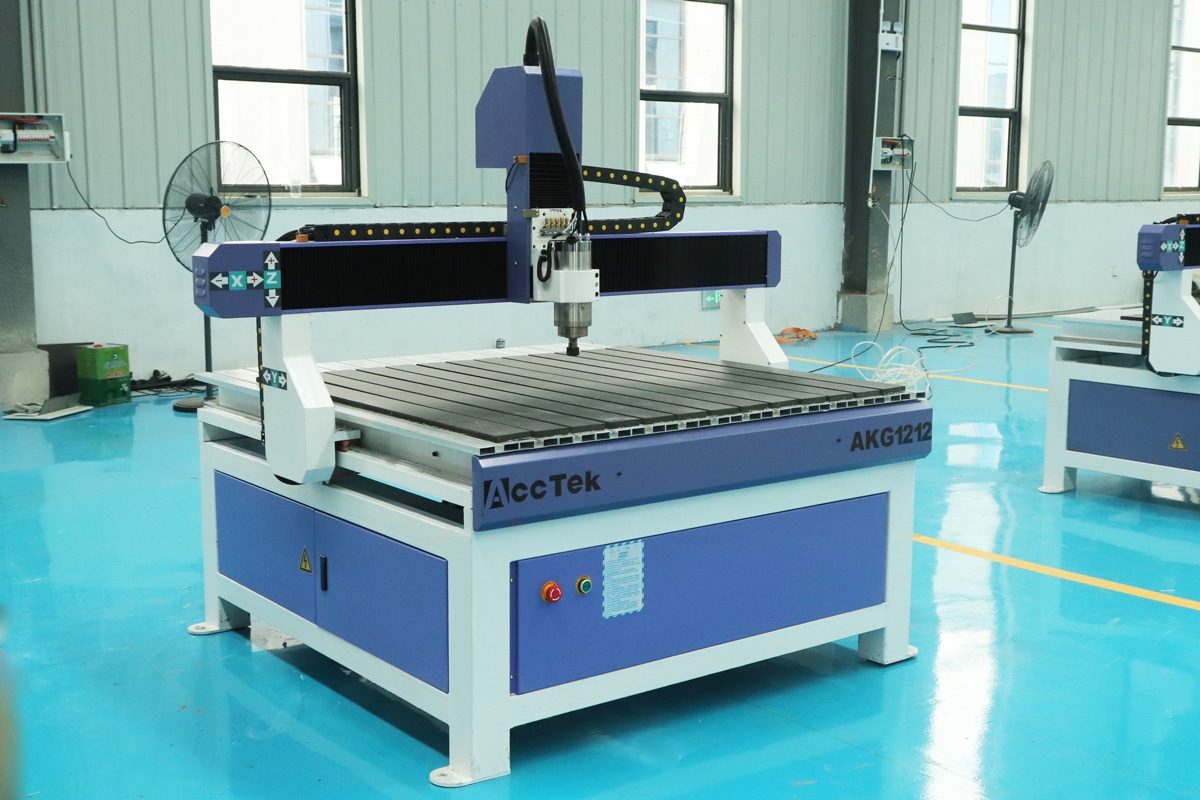
In modern advertising and sign-making, الموجهات CNC serve as the bridge between creative design and precise production. Whether producing channel letters, engraved logos, acrylic panels, or custom displays, a successful outcome depends on more than just advanced equipment—it requires a clear, well-coordinated workflow that guides each project from concept to completion. Understanding this process helps ensure accuracy, efficiency, and consistent visual quality in a fast-paced production environment.
This article outlines a typical advertising CNC router workflow, following the full journey from CAD design and CAM programming to material preparation, machining, and final finishing. Breaking down each stage of the process provides practical insight for designers, machine operators, and workshop managers looking to streamline operations, reduce costly errors, and achieve reliable results from CAD to cutting.
Design Preparation: Concept and CAD Creation
Design preparation is the first and arguably most critical step in the advertising CNC router workflow. It bridges the gap between creative ideas and precise digital instructions that the CNC machine can follow. By carefully understanding customer requirements, considering the application environment, and creating accurate CAD designs, designers lay the groundwork for efficient machining, high-quality finished products, and a smooth transition to the CAM and cutting stages.
Understanding Customer Requirements and Application Scenarios
The design process begins with a clear understanding of the customer’s expectations and the intended application of the advertising product.
- Clarifying Design Expectations: Before any CAD work begins, it is essential to clearly understand the customer’s requirements. This includes design style, branding guidelines, dimensions, budget, and delivery timelines.
- Defining the Application Environment: Equally important is identifying where and how the advertising product will be used. Factors such as indoor or outdoor installation, exposure to weather, lighting conditions, viewing distance, and mounting methods all influence design decisions.
Creating Vector and 3D Designs Using CAD Software
Once customer requirements and application scenarios are understood, the next step is to translate ideas into digital designs using CAD software.
- Choosing the Right Design Type: Depending on the project, designers may create 2D vector drawings or 3D models. Vector designs are ideal for cutting, engraving, and contouring, while 3D models are better suited for relief carving, dimensional letters, and layered signage.
- Ensuring Accuracy and Clean Geometry: Designers must ensure that all paths are properly closed, lines do not overlap unnecessarily, and dimensions are accurate. Logical layering and organized drawing structures make it easier to assign machining operations later in CAM software.
Common Design Considerations for Advertising Materials
Advertising designs must balance aesthetics with machinability.
- Font Selection and Legibility: Fonts must be clear and readable after machining, with sufficient stroke width to prevent breakage or incomplete cuts, especially for small or intricate lettering.
- Depth Settings for Engraving and Carving: Engraving or carving depth should be tailored to both the material and the desired visual effect. Too shallow, and the design may lack visibility; too deep, and it can weaken the material or increase tool wear.
- Scaling and Proportion: Designers must consider viewing distance, installation location, and material limitations when setting overall dimensions. Correct scaling guarantees that letters, logos, and graphics remain legible and impactful once produced.
File Formats Commonly Used for CNC Routing
To ensure compatibility with CAM software and CNC controllers, designs are saved in widely supported file formats.
- Common 2D File Formats: For 2D cutting and engraving, widely used file formats include DXF, DWG, and AI. These formats are ideal for vector-based designs, allowing precise contour cutting and engraving while maintaining clean paths for the CNC router to follow.
- Common 3D File Formats: For 3D designs, especially relief carving or dimensional signage, formats such as STL, STEP, and IGES are commonly used. These files retain complex 3D geometry and surface details, ensuring accurate reproduction of models on the CNC router.
Thorough design preparation ensures that every advertising project starts on a solid foundation. By aligning CAD designs with customer expectations, practical application needs, and material capabilities, designers can minimize errors, streamline the workflow, and produce visually appealing, durable signage. A well-executed CAD design not only simplifies the CNC machining process but also sets the stage for consistent, professional results from concept to finished product.
CAM Programming: Turning Designs into Toolpaths
Once CAD designs are finalized, the next step in the advertising CNC router workflow is CAM programming, where digital drawings are converted into machine-readable toolpaths. This stage determines how the CNC router will move, cut, and carve the material, directly affecting accuracy, efficiency, and surface quality. Proper CAM programming ensures that the artistic vision captured in the CAD file is faithfully translated into a physical product.
Importing CAD Files into CAM Software
The first step is importing the finalized CAD files—2D vector drawings or 3D models—into CAM software. The software interprets the geometry and prepares it for machining. During import, designers may need to check for errors such as open contours, overlapping lines, or non-manifold surfaces, as these can cause issues in toolpath generation.
Selecting Machining Strategies
Different parts of a design may require different machining strategies. Common operations in advertising CNC work include:
- Contour Cutting: Used for cutting out the main shapes of letters, logos, or signs. Contour cutting follows the outline of the design and is typically the primary operation for creating individual pieces.
- Engraving: Ideal for adding text, logos, or decorative details on the surface of a material. Engraving requires precise toolpaths to maintain clarity, especially for fine details or small fonts.
- Pocketing: Used to create recessed areas or layered effects. Pocketing removes material within a defined boundary and is common in layered signage or dimensional logos.
- Relief Carving: Applied to 3D elements and decorative textures. Relief carving uses 3D toolpaths to create depth and contour, giving signs a more dynamic, dimensional appearance.
Tool Selection and Parameter Setup
The choice of tools and settings directly affects surface finish, cutting efficiency, and tool life. Factors to consider include:
- Tool Type and Size: End mills, V-bits, and ball-nose cutters are commonly used in advertising CNC work. The selection depends on the material type, detail level, and desired finish. For example, a V-bit is ideal for engraving fine text, while a larger end mill may be used for contour cutting or pocketing thicker materials.
- Spindle Speed and Feed Rate: These parameters must be adjusted according to the material’s hardness and the tool’s specifications. Higher spindle speeds are often used for soft materials like acrylic or MDF, while slower speeds are preferable for metals or harder plastics to prevent tool wear or overheating.
- Cutting Depth and Passes: Setting appropriate cutting depths and the number of passes ensures that material is removed efficiently without overloading the tool or causing deformation. Shallow, multiple passes are generally safer for delicate or detailed designs.
Toolpath Simulation and Optimization
Before machining, most CAM software allows for toolpath simulation. This step lets operators verify the cutting sequence, detect potential collisions, and optimize paths for efficiency. Simulating the toolpaths reduces errors, avoids wasted material, and helps predict machining time.
CAM programming bridges the gap between creative design and physical production. By carefully selecting machining strategies, choosing appropriate tools, setting cutting parameters, and verifying toolpaths through simulation, operators can ensure that the CNC router executes each design accurately and efficiently. A well-planned CAM process not only reduces errors and material waste but also lays the foundation for high-quality, professional advertising products.
اختيار المواد وتحضيرها
Material selection and preparation are critical steps in the advertising CNC router workflow, as they directly impact cutting quality, durability, and the visual appeal of the final product. Choosing the right material and preparing it properly ensures that the CNC router can work efficiently while producing precise, clean results.
اختيار المادة المناسبة
Different materials offer unique properties that make them suitable for specific types of signage or display applications.
- Acrylic: Known for its smooth surface, vibrant colors, and translucency, acrylic is ideal for illuminated signs and decorative displays. It can be easily cut and engraved while maintaining a polished finish.
- PVC and Foam Board: Lightweight and easy to machine, these materials are well-suited for indoor signage, temporary displays, or prototypes. They are cost-effective and allow for quick production.
- MDF (Medium-Density Fiberboard): MDF is consistent, stable, and excellent for engraving or cutting detailed designs. It is often used for templates, stencils, or painted signs.
- Aluminum Composite Panels (ACP): Durable, weather-resistant, and rigid, ACPs are commonly used for outdoor signage that requires long-term performance and structural stability.
Material Thickness and Surface Considerations
The thickness of the material affects not only the cutting depth and tool selection but also the structural stability of the finished product. Thicker materials may require slower cutting speeds, multiple passes, or larger tools to achieve clean cuts, while thinner materials demand careful handling to avoid breakage or warping.
Surface quality is equally important. Uneven, scratched, or dirty surfaces can interfere with the CNC router’s accuracy, leading to rough edges, poor engraving quality, or dimensional errors. Preparing a smooth, clean surface ensures that toolpaths are executed precisely and that the final product has a professional finish. In some cases, protective films may need to be removed or the surface lightly sanded to optimize cutting performance.
Preparing Materials for CNC Machining
Even high-quality materials can produce subpar results if they are not correctly prepared before cutting or engraving. Proper preparation includes:
- Cleaning: Remove dust, grease, or protective films from the material surface. Any debris or residue can interfere with cutting, causing scratches, burns, or inaccurate toolpaths.
- Flattening: Ensure the material lies flat on the CNC bed. Warped or uneven sheets can lead to uneven cuts, depth errors, or tool collisions. For flexible materials, additional support or backing may be necessary.
- Fixturing and Securing: Properly secure the material using clamps, vacuum tables, or adhesives. Preventing movement during machining is crucial, especially for intricate cuts or deep engraving. Loose materials can shift, resulting in misaligned cuts and wasted material.
By carefully selecting suitable materials and preparing them correctly, operators can minimize machining errors, protect tools, and achieve consistent, high-quality results. Attention to material properties, thickness, surface condition, and secure fixturing lays the foundation for precise cuts, clean engravings, and durable advertising products that meet both client expectations and production standards.
Machine Setup and Pre-Operation Checks
Before any cutting or engraving begins, proper machine setup and pre-operation checks can be performed to ensure accuracy, safety, and efficiency. Even with a well-prepared design and material, skipping these steps can lead to errors, material waste, or damage to the CNC router. This stage bridges the gap between planning and production, preparing both the CNC router and the operator for smooth operation.
Loading Tools and Setting Tool Length Offsets
The first step in preparing a CNC router for production is correctly loading the required cutting tools and calibrating their lengths. Operators must securely load the required tools—such as end mills, V-bits, or ball-nose cutters—into the spindle and set accurate tool length offsets. Proper calibration ensures that the CNC machine can follow the programmed depths and maintain dimensional accuracy throughout the job.
Securing Materials on the CNC Router Table
Material must be firmly fixed to prevent movement during machining. Depending on the material type, thickness, and size, operators may use a variety of methods to hold the workpiece in place:
- Clamps: Adjustable clamps are commonly used for rigid materials like acrylic, MDF, or aluminum panels. They provide strong, localized holding without interfering with the cutting path.
- Vacuum Tables: For thin sheets or large panels, vacuum tables offer uniform holding across the entire surface, preventing warping or shifting during cutting.
- Adhesives or Double-Sided Tape: Lightweight materials or temporary projects can be secured with adhesives or double-sided tape for quick setup, though they are best for shallow cuts or engraving.
Setting Work Coordinates and Zero Points
Accurately setting work coordinates and zero points is a critical step in CNC routing, as it establishes the reference for all machining operations. Operators typically define the zero points based on the material’s position on the CNC table. This may involve:
- Positioning the tool tip at a specific corner or the center of the material.
- Setting the Z-axis zero at the top surface or the bottom of the material, depending on the machining requirements.
- Confirming X and Y offsets to match the intended layout from the CAM program.
Safety Checks and Machine Readiness Inspection
Before starting the program, operators should perform safety and readiness checks. Key steps include:
- Inspecting the Tools and Spindle: Check that cutting tools are sharp, properly installed, and free from damage. Verify that the spindle operates smoothly without unusual vibrations.
- Verifying Machine Guards and Covers: Ensure that all protective covers, shields, and safety guards are in place and functioning properly.
- Clearing the Work Area: Remove any loose objects, debris, or obstructions from the CNC table and surrounding workspace.
- Checking Electrical and Pneumatic Connections: Confirm that power, air supply, and any auxiliary systems are functioning correctly.
- Testing Movements: Jog the machine along all axes to confirm smooth motion and proper response before running the program.
Thorough CNC router setup and pre-operation checks help guarantee consistent, high-quality results while protecting both tools and materials. By carefully loading tools, securing materials, setting work coordinates, and performing safety inspections, operators can minimize errors, prevent accidents, and ensure that the CNC router executes each design precisely as intended.
CNC Routing and Cutting Process
The CNC routing and cutting stage is where digital designs come to life, transforming CAD and CAM data into tangible advertising products. This step involves executing programmed toolpaths with precision while carefully monitoring the material and machine. Proper attention to cutting quality, machine performance, dust management, and multi-process operations ensures that the final product meets design specifications and maintains professional standards.
Executing the Machining Program
Executing the machining program is the first step in turning the digital toolpaths into physical cuts on the material. Once the CAM-generated program is loaded into the CNC router, the machine follows the programmed instructions to perform cutting, engraving, or carving operations with precision. For complex or critical jobs, operators often perform a dry run to verify that the toolpaths align correctly and that there are no collisions or errors. Close attention during initial passes helps detect any issues early and prevents material or tool damage.
Monitoring Cutting Quality and Machine Performance
During the CNC routing process, continuous monitoring to ensure both the quality of the cuts and the proper functioning of the machine. Operators should observe the workpiece for smooth, clean edges, consistent engraving depth, and accurate replication of the design. Machine performance should also be closely watched. This includes checking spindle load, feed rate, and the behavior of moving axes ensures that adjustments can be made in real-time if needed. Regular checks help maintain precision and prevent errors such as chipping, smearing, or overcutting.
Managing Dust Collection and Cooling
Proper dust collection and cooling help during CNC routing to maintain machining quality, protect the equipment, and ensure a safe working environment.
- Dust Collection: Using vacuum systems or dust extractors removes debris from the cutting area, keeping the material surface clean and preventing chips from affecting the cutting path or accumulating on the machine.
- Cooling and Lubrication: For materials that generate heat during cutting, air or liquid cooling can prevent overheating, reduce tool wear, and maintain a smooth surface finish.
- Workplace Safety: Efficient dust and heat management improves visibility and air quality, protecting the operator and reducing fire hazards in the workshop.
Handling Multi-Process Jobs
Some advertising projects require multiple machining operations, such as engraving, pocketing, and contour cutting, or even layered carvings. Operators must carefully manage:
- Tool Changes: Different operations may require different tools. Operators must change tools carefully, ensuring each one is properly installed and calibrated before resuming the program.
- Material Repositioning: For jobs that involve flipping, rotating, or layering materials need accurate realignment. Marking reference points or using alignment fixtures helps maintain consistent positioning.
- Sequence Management: Planning the machining sequence in advance reduces the risk of damaging finished features and ensures smooth material handling.
Successful CNC routing relies on careful execution, continuous monitoring, and effective handling of all machining processes. By following the programmed toolpaths accurately, managing cutting quality, controlling dust and heat, and coordinating multi-step operations, operators can achieve precise, consistent, and visually appealing advertising products. This stage is the heart of the workflow, turning well-prepared designs into high-quality, finished signage and displays.
ما بعد المعالجة والتشطيب
Once the CNC routing and cutting operations are complete, post-processing and finishing are essential steps to refine the appearance, ensure durability, and prepare the advertising product for installation. This stage focuses on refining surface quality, enhancing visual appeal, and preparing components for final assembly or installation. Proper finishing ensures that the final signage not only looks impressive but also meets durability and quality expectations.
Removing Parts and Cleaning Edges
After the CNC machining process is complete, the first step in post-processing is carefully removing the finished parts from the machine table. This must be done gently to avoid chipping, cracking, or scratching the material, especially for delicate or thin components like acrylic letters or foam board signage. Once removed, the edges may require sanding, filing, or trimming to remove burrs, splinters, or rough spots, especially on materials like acrylic, MDF, or foam board. This step helps achieve a smooth, clean surface ready for finishing.
Polishing, Sanding, or Surface Treatments
After cleaning and smoothing edges, additional surface treatments are often applied to enhance the appearance and quality of the finished parts. The choice of treatment depends on the material and the desired visual effect.
- Polishing: Acrylic and plastic components can be polished to achieve a glossy, professional finish. Polishing not only improves aesthetics but also highlights engraved details and enhances transparency for illuminated signs.
- Sanding: Materials like MDF or foam board may require sanding to remove rough spots, create an even surface, or prepare for painting. Sanding ensures better adhesion of coatings and improves the overall finish.
- Surface Treatments: Metals, composite panels, or specialty plastics may undergo brushing, anodizing, flame treatment, or other protective processes. These treatments enhance durability, prevent surface damage, and prepare the material for further decoration or outdoor use.
Painting, Coating, or Surface Decoration
Once the parts are polished, sanded, or otherwise prepared, the next step is adding color, protective layers, or decorative elements to enhance both appearance and durability.
- Painting: Acrylic, MDF, or foam components can be painted to match specific brand colors or design requirements. Spray painting, airbrushing, or hand application can be used depending on the size and detail of the parts.
- Coating: Protective coatings, such as clear varnish, powder coating, or UV-resistant sprays, increase durability and weather resistance, especially for outdoor signage.
- Surface Decoration: Additional decorations, such as adhesive vinyl, decals, or laser-etched graphics, can be applied to add logos, patterns, or textures that reinforce brand messaging.
Assembly of Letters, Logos, or Signage Components
The final step in post-processing is assembling individual CNC-machined parts into complete advertising products. Many signage projects require precise alignment and secure joining to achieve a professional appearance and structural stability. Components may be assembled using adhesives, fasteners, or mounting hardware, depending on the material and installation requirements. During assembly, careful attention is paid to spacing, alignment, and orientation to ensure consistency and visual balance. For illuminated or dimensional signage, this stage may also involve integrating lighting elements or backing panels.
Post-processing and finishing bring precision machining together with visual refinement. Through careful edge cleaning, surface treatment, painting or coating, and accurate assembly, CNC-produced parts are elevated into high-quality advertising signage. Attention to detail at this stage ensures consistency, durability, and a strong visual impact, completing the journey from digital design to finished product.
تلخيص
This article outlines the complete workflow of an advertising CNC router, guiding readers through each key stage from initial CAD design to final cutting and finishing. It explains how customer requirements are translated into accurate CAD drawings, how CAM programming converts designs into precise toolpaths, and how proper material selection, machine setup, and machining execution ensure reliable results. Together, these steps form a structured, efficient workflow that helps designers and operators produce high-quality, professional advertising signage with consistency and confidence. Continue reading “كيفية تحسين مسارات أدوات جهاز التوجيه CNC لإنتاج لافتات سريعة؟” to learn more strategies for improving your production process.
أكتيك is a professional CNC router manufacturer dedicated to providing reliable, high-performance solutions for users across the advertising, woodworking, and industrial sectors. With a wide range of CNC router models—including 3 محاور, 4 محاور, 5 محاورو ATC configurations—we are able to meet the diverse needs of beginners, growing workshops, and large-scale production facilities alike. From machine selection and configuration to installation guidance and ongoing support, we work closely with customers to ensure each CNC router fits their specific application and production goals. For users seeking dependable machines and professional service, AccTek is a trusted partner for efficient and scalable CNC routing solutions.